
Today, shaping the body, gluing up the maple top, rough-cutting the top, gluing the two together, and installing the truss rod.
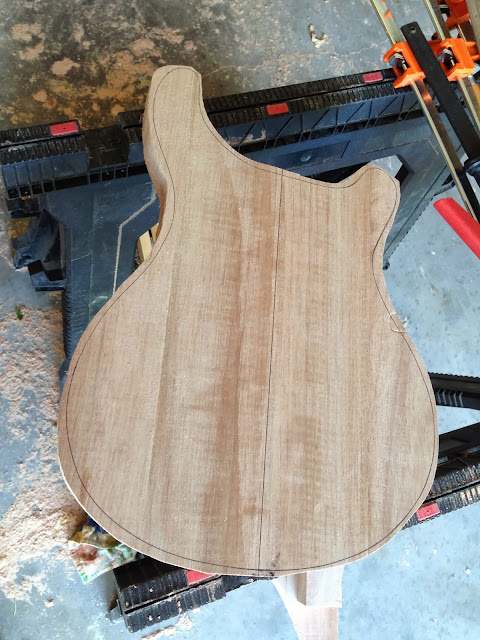
Easy to do a basic band saw cut around the line. In following the advice of others, I am making sure to draw the center line on absolutely everything. It's the only baseline measurement that must be followed.
Next, I stacked the carve templates on top of each other with the main, body shape on top (in order to give the bearing-router bit enough clearance to only do about a 1/2 inch cut to follow the template). To keep the templates secure, I screwed the templates to the body where the pickups will be routed. I made my first pass.
Next, I took off the templates and used the initial cut as the template for my next pass of about another 1/2 inch.
Finally, adjusted the router up another 1/2 inch and made the final pass.

Next, not having a bookmatched set of maple, I used my 1"x8" board and cut two pieces I could make that looked as close as possible to be bookmatched. After gluing, clamping, and resting overnight, I rough cut it with the bandsaw. Unfortunately, I forgot to take a picture of the rough-cut top. Next I glued and clamped the top to the body following the center-lines.

Now, I turned back to the neck and chiseled out a small piece of maple to use to fix the tear out from my forstner bit disaster in the truss rod recess on the headstock. I glued and clamped it together. I'm only concerned with the edge as I will put a veneer on the headstock later.

Next, I took a metal washer that fit the truss rod recess. This washer had a very small interior diameter that was perfect for my needs. I cut the top off the washer with a hacksaw, and drilled out a 5/16" hole in the new metal piece, and fit it into the truss rod recess. Then, I cut and threaded my other end of the rod using a #28 thread count for my #28 acorn nut so I can make very small adjustments on the rod.

Finally, I cut out 1/4" pieces of left-over maple and glued it into the slot above the truss rod. I'll band-saw and belt-sand the excess off after the glue has set.

The only set-back today was realizing the body is too thick. I'm gonna wait until tomorrow, Lord willing, when I have access to a craft shop and thickness plane it down about 3/8". After that, it's time to start working on the carved top.... and then find myself some fretwire and inlay material for the fingerboard.
Enough for today. Actually starting to look like a guitar. I'm stoked and can't believe my first one is going this well.
previous, next
Easy to do a basic band saw cut around the line. In following the advice of others, I am making sure to draw the center line on absolutely everything. It's the only baseline measurement that must be followed.

Next, I stacked the carve templates on top of each other with the main, body shape on top (in order to give the bearing-router bit enough clearance to only do about a 1/2 inch cut to follow the template). To keep the templates secure, I screwed the templates to the body where the pickups will be routed. I made my first pass.
 |
| Turned upside down after the first pass. |
 |
| Also, flipped upside down. |
Finally, adjusted the router up another 1/2 inch and made the final pass.

Next, not having a bookmatched set of maple, I used my 1"x8" board and cut two pieces I could make that looked as close as possible to be bookmatched. After gluing, clamping, and resting overnight, I rough cut it with the bandsaw. Unfortunately, I forgot to take a picture of the rough-cut top. Next I glued and clamped the top to the body following the center-lines.

Now, I turned back to the neck and chiseled out a small piece of maple to use to fix the tear out from my forstner bit disaster in the truss rod recess on the headstock. I glued and clamped it together. I'm only concerned with the edge as I will put a veneer on the headstock later.

Next, I took a metal washer that fit the truss rod recess. This washer had a very small interior diameter that was perfect for my needs. I cut the top off the washer with a hacksaw, and drilled out a 5/16" hole in the new metal piece, and fit it into the truss rod recess. Then, I cut and threaded my other end of the rod using a #28 thread count for my #28 acorn nut so I can make very small adjustments on the rod.

Finally, I cut out 1/4" pieces of left-over maple and glued it into the slot above the truss rod. I'll band-saw and belt-sand the excess off after the glue has set.

The only set-back today was realizing the body is too thick. I'm gonna wait until tomorrow, Lord willing, when I have access to a craft shop and thickness plane it down about 3/8". After that, it's time to start working on the carved top.... and then find myself some fretwire and inlay material for the fingerboard.
Enough for today. Actually starting to look like a guitar. I'm stoked and can't believe my first one is going this well.
previous, next
No comments:
Post a Comment