Showing posts with label guitar. Show all posts

Saturday, December 21, 2013

Paul Reed Smith Custom 24 Build Part 10

Messing up and recovering.

So, last I posted, I had drilled the holes for the bridge post bushings and had grain-filled the mahogany.

Two weeks ago, I started the staining process for the top.  The green from Stewmac was great thinned in water and all by itself without any additions.


So, after letting it sit for a week, I pulled off the masking tape off the sides..... and inadvertently, pulled off a lot of the grain filler from the end-grain parts of the sides.  Will not make that mistake again.  Then, I scraped the binding with a razor (another, extremely delicate process that will take many more times to master).  Then, after I received the awesome Seymore Duncan hotrod set of PUPs, put it 'together' for a mock-up photo.


That's when I noticed my horrible mistake.


The holes for the bridge posts were drilled 1.5mm too narrow.  Devastated and instantly thinking I had ruined the whole thing, I left it for a week to ponder my options.  I settled on getting a hole-saw for my drill press with the pilot drill bit removed.  I purchased one that would leave a hole slightly larger than the original post-hole.  After measuring both holes from center, the one millimeter or so of difference that would be corrected if I redid both holes was negligible and not worth the effort, so I decided to redo the bass side of the bridge.


With the plug in hand, I filed off the sides until the plug fit snugly into the hole and then glued it in place.


Carefully, I stained the plug, and, after waiting a day, drilled another hole.


Not too bad.  I sized it up against the bridge and it looked good.  Crossing my fingers, I screwed in the posts and put the bridge in.


Perfect fit.  Success!!!  With confidence now high, I'm looking forward to warmer weather and a chance to start finishing.  Next, I'll post on the disastrous attempts to file string slots on the nut.  Looks like I'll be ordering one pre-filed.

previous

Monday, December 2, 2013

Paul Reed Smith Custom 24 Build Part 9

So, over Thanksgiving weekend, I looked to route the recesses for the pickups and the cavity cover, drill the recesses for the control knobs, drill holes for the tuners, mount the bridge posts, and start the finishing process.

I started with the cavity cover recess.  I tried to do it with the dremel but it just didn't work as my bit couldn't cover enough territory, so I used the router and template.  Because the depth of cut was so shallow, I had to raise the template with wood blocks to significant height to ensure the template made contact with the pattern bearing.  I think this threw off the cut just slightly as you can see there.  I also used forstner bits to route out wood to about an 1/8th inch from the top to ensure the control pots had enough threads through on the top to mount the knobs.


Next, I routed the pickup routes to a depth of 3/4 inch.  I plan on simply using a forstner bit to get the legs at a later time.  Because the neck was not yet glued in, I simply used a band saw to cut out the portion taken up by the neck.  Not perfectly pretty, but functional and will be hidden in the final product.  Oh, and that's my daughter's hand in the bottom, not mine. :)


Next, I carefully measured the center points for the bridge posts using StewMac's online fret calculator.  With this bridge, thankfully, even if I'm off slightly, the intonation should still be easy to correct.  Excited to fit it, I jumped the gun and gently hammered in the posts, forgetting about the ground wire.  After remembering this crucial detail the next day, I used a lengthy 1/8in drill bit to go in from the cavity to the center of the bridge post hole.  I then pushed a length of coated ground wire with the end exposed into the hole and hammered the post back in.  The wire is now held to the hole by friction and the important electrical consideration is now taken care of.


Had time to do a quick mockup.  Camera phones are so hard to get a good focus while holding them high overhead.

Finally, I glued in the neck and hoped the grain filler would even out my slight gaps in the neck joint.  Oh, forgot about this one:  When I did the round-over routing of the bottom of the body, I somehow managed to ride up the jack cavity with the bearing, causing a dip into the body.  It's not minor, but I'm hoping I can build up some grain filler on that mistake and keep a smooth contour around the body.  I'll try to remember to take a picture of that next time.  Something to keep in mind for the next one I'm sure.


Oh, and I started working on the nut.  Really nervous about filing the string slots.  Shaping the nut has been pretty easy so far.


Grain filler on and scraped.  Will sand next.  Geez, sorry for the bad focus.  Bad photographer!!  Very bad!!

Monday, November 25, 2013

Paul Reed Smith Custom 24 Build Part 8

OK, it's been a little while since an update.  Sanded down the binding flush to the body and sanded down the body (width-wise) that extended beyond the binding.  Looks an awful lot better than when I first took the tape off.  Lots and lots of hand sanding.


Glued on the fretboard after filing and sanding down the binding to match the height of the board.  Dismayed I didn't get high enough binding for nibs... oh well.


Next, finish sanded the shape of the neck and sanded down the binding to match the thickness of the neck.  Also, used 1mm green celluloid pick for the side dots.  Used a leather-hole punch to make the dots, drill-pressed the holes, and super-glued them in.  Really easy to do and quickly done.  Then sanded down the dots flush with the neck.


Finally for this past weekend, glued on a head-stock veneer.  Nothing cool or classy, just simple craft-store plywood.  Next one, I'll use some decent wood.


previous, next

Saturday, November 2, 2013

Paul Reed Smith Custom 24 Build Part 6

The Big Carve.

So, Thursday, I took out the templates, attached them to the top and routed the contour paths.  I'll just say the templates were not great, but I think it had more to do with my error in cutting them out of the MDF.  They just didn't lay right.  Anyway, I made multiple passes for the first cut, the deepest and closest to the outer edge.

First Pass
Then, made a second with a second template (I had to make a new one, different than the ones I posted at the beginning of this build).  Then the third pass with the top part.  I staggered the changes of depth evenly rather than following some other method.

The Three Contour Routing Passes
So, on Saturday, we went from high tech to low tech.  The belt sander I had been counting on using is just too unwieldy and large to get into the curves of the top.  So, I busted out the Sureform rasp and went to town on the more open sides and bottom.  After roughing out the carve on those places, I had to turn to the three chisels I have.  I will say the vast majority of the post-routed carve is chiseled.  I learned a lot about chiseling.... and only a few minor mistakes that were blended in easily.

Time to Break Out the Chisel.... Oh, and I Routed My Neck Mortise Too... Did I Post That Yet?


I will say the horns were a nightmare.  I'm trying to use the PRS body style, but I really don't like the faux binding idea.  So I am trying to figure out how to incorporate binding especially around the horns.  At the bottom cutaway, the PRS has a really deep, scooping carve which would not accept a binding channel... so I'm keeping that carve a little less pronounced .... we'll see.  A work in progress.

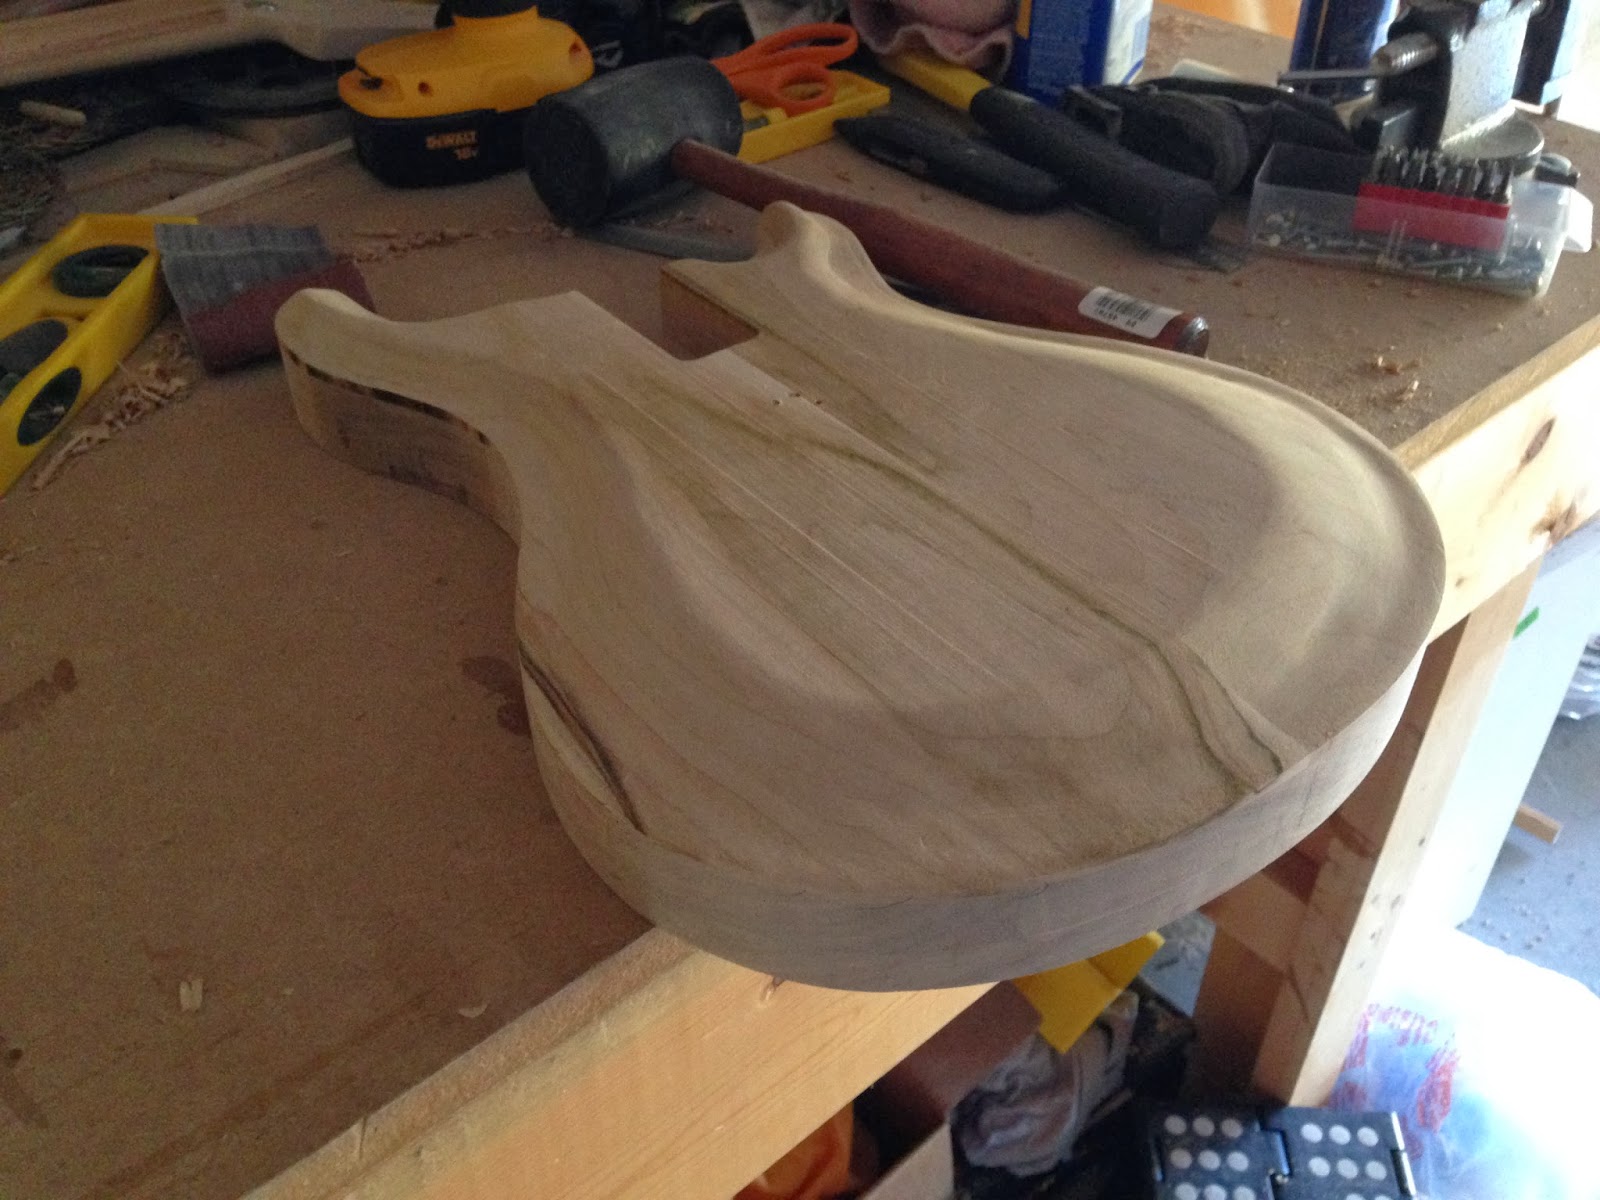
So, with the basic carve done, I pulled out my random orbital sander and smoothed it out, working the transitions better.  Again, like the belt sander, the orbital is just too large to use for the curves.  More often than not, I had to hand sand with 60-grit.... Literally, just hand and paper.  Reached my stopping point with a pretty good carve going.  There is some pitting I need to get down, the horns need a lot more work, and I need to examine it for balance and symmetry.

Rough Carve With Chisels

After Preliminary Sanding

Done for Today... With Directional Lighting to Show the Contours

previous, next

Monday, October 14, 2013

Paul Reed Smith Custom 24 Build Part 5

Today, shaping the body, gluing up the maple top, rough-cutting the top, gluing the two together, and installing the truss rod.

Easy to do a basic band saw cut around the line.  In following the advice of others, I am making sure to draw the center line on absolutely everything.  It's the only baseline measurement that must be followed.


Next, I stacked the carve templates on top of each other with the main, body shape on top (in order to give the bearing-router bit enough clearance to only do about a 1/2 inch cut to follow the template).  To keep the templates secure, I screwed the templates to the body where the pickups will be routed.  I made my first pass.

Turned upside down after the first pass.
Next, I took off the templates and used the initial cut as the template for my next pass of about another 1/2 inch.

Also, flipped upside down.

Finally, adjusted the router up another 1/2 inch and made the final pass.


Next, not having a bookmatched set of maple, I used my 1"x8" board and cut two pieces I could make that looked as close as possible to be bookmatched.  After gluing, clamping, and resting overnight, I rough cut it with the bandsaw.  Unfortunately, I forgot to take a picture of the rough-cut top.  Next I glued and clamped the top to the body following the center-lines.


Now, I turned back to the neck and chiseled out a small piece of maple to use to fix the tear out from my forstner bit disaster in the truss rod recess on the headstock.  I glued and clamped it together.  I'm only concerned with the edge as I will put a veneer on the headstock later.


Next, I took a metal washer that fit the truss rod recess.  This washer had a very small interior diameter that was perfect for my needs.  I cut the top off the washer with a hacksaw, and drilled out a 5/16" hole in the new metal piece, and fit it into the truss rod recess.  Then, I cut and threaded my other end of the rod using a #28 thread count for my #28 acorn nut so I can make very small adjustments on the rod.


Finally, I cut out 1/4" pieces of left-over maple and glued it into the slot above the truss rod.  I'll band-saw and belt-sand the excess off after the glue has set.


The only set-back today was realizing the body is too thick.  I'm gonna wait until tomorrow, Lord willing, when I have access to a craft shop and thickness plane it down about 3/8".  After that, it's time to start working on the carved top.... and then find myself some fretwire and inlay material for the fingerboard.

Enough for today.  Actually starting to look like a guitar.  I'm stoked and can't believe my first one is going this well.

previous, next

Saturday, October 12, 2013

Paul Reed Smith Custom 24 Build Part 4

So, weekend again after going to the awesome US v. Jamaica World Cup qualifier yesterday.  I got to work on the neck some more, concentrating on routing for the truss rod, making the truss rod, and shaping the neck a little.  I cut some scrap maple to make ears for my headstock to accommodate the PRS design.  After gluing them on, I took the leftover pieces of the neck, doubled them up and glued them to the end of the neck to make the heel.


The truss rod was my first attempt at using a die to cut threads, but I didn't run into too much trouble.  The important part is to file down the end and give it a little bevel so it can accommodate the die better.  It was more difficult than I expected but I took my time.  Once threaded, I put on a barrel nut to secure in the body-side of the neck and hammered the excess threads down to lock it in place.


As this is my first one and a practice one, rather than spend a load on a single piece of mahogany for the body, I got a 1x8 plank 8 feet long and cut it into 2 ft segments to edge glue them together, then double them up to get a solid body.


Routed the truss rod channel, roughly cut the neck to shape with the band saw, put my belt sander in the shop vise and sanded the first, rough shape of the neck.


The one part I was dreading was drilling the well for the washer and nut at the top of the neck for the truss rod.  Didn't have any kind of jig, so I attempted to jury rig one.  I'm sure Ryobi does not recommend this method:


Unfortunately, had some tear out and the forstner bit jogged off the neck scratching everything.


So, I tried it by hand with the drill.  Worse results.


So.... finished it up with a hand chisel and will have to repair the tear out.  I'm having a hard time finding something to use for the 'washer' part of the truss rod.  I have an acorn nut to use for the top, but don't want to have to order some stupid half-moon truss rod washer from Stew Mac for tons of shipping costs when I could find something in house.  Enough for today and time to watch Michigan football!

previous, next

Sunday, October 6, 2013

Paul Reed Smith Custom 24 Build Part 3

So, I move on to the practice neck.  It's a piece of 3/4"x3" maple.  Nothing special (ie. not quarter or rift-sawn), just a nice hard piece of maple.  Because I want more strength in the neck so as to avoid catastrophic neck breakage that the one-piece mahogany Les Pauls are notorious for, I am trying to cut a 15 degree angle on the neck and make the angled headstock using a scarf joint.  How to do that on a band saw was my first problem.  The worthless rip fence that came with the Ryobi 3" cut, 9" depth saw would only angle between 90 and 45 so I clamped a miter box to the fence, angled the fence to 75 and used the perpendicular side to hold the maple board against.  I made the cut, but it was awful.


I wondered why the cut was not even vertically until I more closely examined the rip fence.  Which lazy company makes a rip fence that is not vertically square!?!?!?!


So, I had to make my own.  This worked much better and allowed me to clamp the board to the jig.


This time, the cut was much better.  A little work on the belt sander to make the sides flush and I was ready for gluing.

So hard for cameras to focus properly on wood-work.  Not enough contrast.

Glued up now.  Scarf joints are terrifying.  They do nothing but slip.  Barring having 30 clamps available, all I could do was clamp it best I could, muscle the pieces of wood back together after it slipped all over the place.  Finally, it held.  It is drying right now, so it's still possible the whole thing slipped out again.


That is all for now.


previous, next